Learn more about this natural wonder and how to prepare for seeing it
The northern lights —known scientifically as aurora borealis — are a natural phenomenon that can be seen in the night sky in wintertime at far northerly latitudes, such as in Iceland. Of course, a lot of natural factors need to align just right in order for auroras to occur and be visible to us.
Keep reading to learn more about this natural wonder and how to prepare for seeing them on northern lights tours in Iceland.
Northern lights facts: causes, colours and visibility
The northern lights look like magic but, in fact, there is a reasonable scientific explanation for them.
- Giant flares (or, solar storms) from the sun — about 150 million kilometres away — send blasts of charged particles hurtling towards our planet.
- Roughly 40 hours later, the particles collide with atoms in Earth’s upper atmosphere, resulting in glowing emissions: the northern (or southern) lights
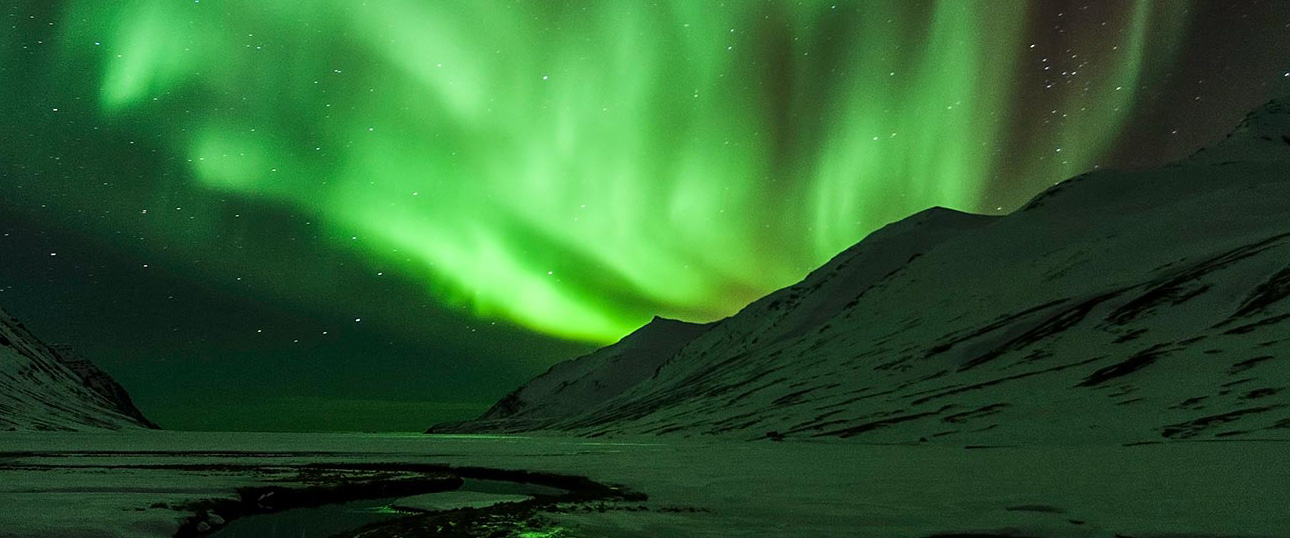
- Auroras take on various shapes, movements, colours and brightness. This all depends on the type of atoms involved, the intensity of the solar activity and the pull of Earth’s magnetic forces.
- The most common colour of northern lights is green, though — more rarely — violet or red hues can also be seen
- The lights may appear like a rippling curtain, streaming rays or an arc, among other forms.
- The Nordic region is ideal for viewing the aurora borealis. In fact, there is a zone in the Northern Hemisphere called the “Northern Lights Belt”, situated from about 65 to 72 degrees north — running through Iceland, which is known to have more auroral frequency and intensity.
Tips for seeing the northern lights
Keep in mind that seeing the northern lights does require the right timing, location and meteorological conditions as well as a good dose of patience and luck. Below are important tips to remember if you want to experience this natural phenomenon.
1. Choose the right month
The northern lights are visible mainly between October and March each year in the Nordic region.
2. Check the forecast
Location means nothing if you don't have the right combo of solar activity and cloudless skies. We recommend checking the Iceland Met Office’s aurora forecast page.
3. Get out of town
It goes without saying that you need dark nights, but it's also ideal to get away from the glare of city lights. A stay in the countryside or a guided tour into the wilderness will greatly improve your view to the sky.
4. Stay up late
The peak time is 11 p.m. to 2 a.m. Some hotels in the countryside may offer a special "wake up" service if the lights come out.
5. Be patient
The lights do not appear on any kind of schedule. You may have to wait a few hours, but most northern lights tours involve some kind of activity or refreshments to keep guests entertained and warm. Unfortunately, sightings can never be guaranteed.
6. Bundle up
Thermal layers and insulated outerwear are essential. If you’re on a guided excursion, you will usually be provided with loaned coveralls and/or other warm garments.
Remember: northern lights are created by the sun and the atmosphere, so sightings can never be guaranteed.
Northern lights photography: a crash course
Thinking of capturing your own shots of the northern lights this winter? Here are some quick tips from Nordic Visitor staff.
Equipment checklist
- Camera: Use an SLR camera with manual focus for best results.
- Tripod: Even with the steadiest hands, a long exposure shot without a tripod is going to be a blurry, jittery mess.
- Shutter release: For even steadier shots, get a remote shutter release so you don’t have to touch (and shake) the camera at all.
- Spare batteries: Freezing temperatures tend to deplete battery levels faster. It doesn’t hurt to bring extra energy for yourself in the form of snacks.
- Headlamp / flashlight: You’ll be shooting in the dark and in very cold temperatures, so it’s good to see what you’re doing.
Camera & lens settings
- Image stabilisation: If your lens has this, turn it off.
- ISO: Increase the ISO to at least 400 or 800, preferably higher. This depends on the specific lens you're using, but is a fair range to work within.
- Aperture (f-stop): Turn your aperture as low as possible. This will result in more light coming through the lens. On most cameras, this number can go down to about 3.5.
- Shutter speed: Do a long exposure of 15 to 30 seconds. The longer the exposure, the more light will be captured.
Hunting the northern lights in Iceland
Ready to come chase some auroras? We recommend these popular winter tour packages:
- GOLDEN CIRCLE CLASSIC - WINTER (4 days / 3 nights)
- WINTER HIGHLIGHTS (5 days / 4 nights)
- NORTHERN LIGHTS CIRCLE TOUR (8 days / 7 nights)
- GOLDEN CIRCLE CLASSIC - WINTER (4 days / 3 Nights)
- BEST OF SOUTH ICELAND - WINTER (6 days / 5 nights)
View your options by browsing our northern lights tours in Iceland.
Or, look further afield and explore all our northern lights tours.